Integrating shortform collections
- Print
Integrating shortform collections
- Print
Article summary
Did you find this summary helpful?
Thank you for your feedback!
This guide introduces how to integrate Shortform Collection.
.png")
Initialization
Here are examples of how you can initialize the Shoplive Shortform without user authentication, simple authentication, and JWT token authentication.
Install with desired auth type of initialization code in common layout (head area, etc.)
Detail information can be found in User Authentication.
Access Key
Access key and secret key can be obtained from Shoplive representative.
Set a template to render a shortform collection with
Enter the code below where you want to display the Shortform list. The template field indicates which layout you want to use for a shortform list.
Choose a shortform collection layout
Shortform lists can be displayed in the 3 formats below. You can also specify whether to use the VIEW MORE button and the maximum number of rows.
Grid1: Vertical Scroll Layout (Large content)
Grid2: Vertical Scroll Layout (Small content)
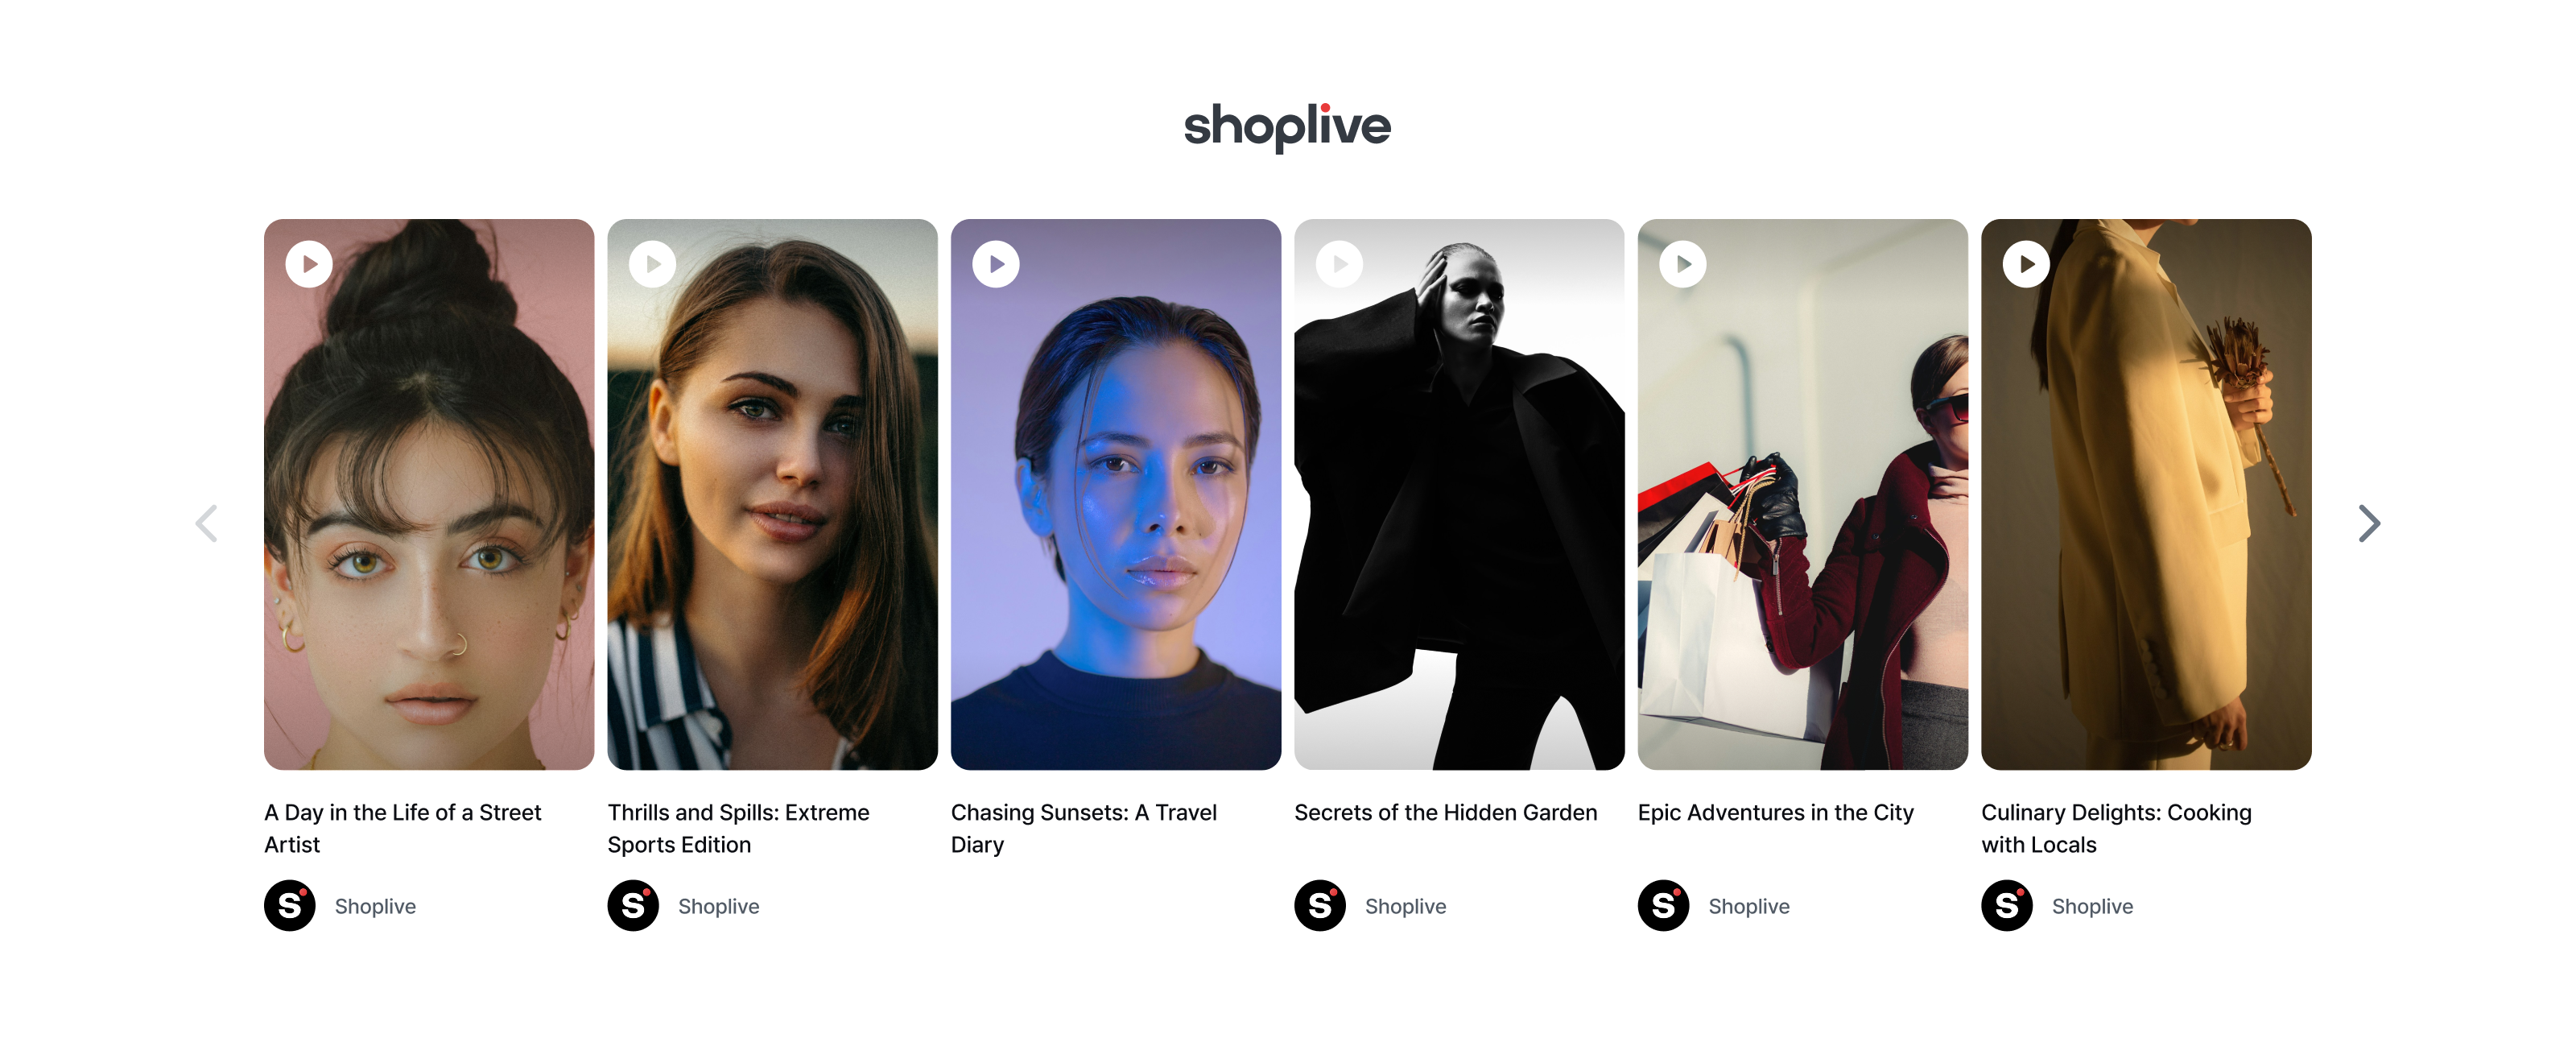
Horizontal: Horizontal Scroll Layout
Grid1: Vertical Scroll Layout (Large content)
Insert below code.
.png "image(95).png")
Grid2: Vertical Scroll Layout (Small content)
Insert below code.
.png "image(96).png")
Horizontal: Horizontal Scroll Layout
Insert below code.
.png")
Configure a shorform collection UI
The rows and hasMoreButton options are available only for Grid1 and Grid2.
<div id="shoplive-shortform-2"></div>
<script defer >
cloud.shoplive.setShortformCollection("shoplive-shortform-2", {template: "GRID2" ,hasMoreButton:true, rows:4} );
</script>Parameter name | Function | Description | Default |
|---|---|---|---|
rows | Max rows | Sets the default number of rows that apply to the vertical scroll layout. | 2 (max:4) |
hasMoreButton | Whether showing the View More button | Indicates whether to display the View more button. If not displayed, additional rows are automatically loaded when the bottom of the list is reached. | true |
Horizontal: Horizontal Scroll Layout
Default Setting
<div id="shoplive-shortform-3"></div>
<script defer>
  cloud.shoplive.setShortformCollection("shoplive-shortform-3", {template: "HORIZONTAL"} );
</script>.png")
Advanced Settings
The
HORIZONTALtemplate supports additional configuration via thehorizontalOptionsetting.This option allows you to control whether navigation arrows are shown and how many Shortform videos are displayed per row.
Advanced Settings
Parameter name | Function | Description | Default |
|---|---|---|---|
| Show navigation arrows | Controls whether left/right arrows are displayed. Clicking the arrows scrolls one item at a time. |
|
| Items per row | Sets the number of shortform cards visible in a single row. | - |