Creating URL to Video
- Print
Creating URL to Video
- Print
Article summary
Did you find this summary helpful?
Thank you for your feedback!
This feature is currently available as a beta service.
If you would like to use this feature, please contact Shoplive.
Easily generate short-form videos by entering a product page URL. The AI automatically crawls the images from the page, analyzes them, and applies the optimal sequence and animation effects for a compelling video. Simply enter the URL to get started with minimal effort.
🔎 For detailed guidance on the Image to Video feature, refer to the [Image to Video Guide].
1. Create a Video Using a URL
1. Go to the URL/Image to Video menu in Video AI, then click the Create button to get started.
.png)
2. After entering the product page URL in the input field, choose the desired video aspect ratio and video length.
1) Set Video Aspect Ratio : You can choose from the following three aspect ratio options
9:16 (1080×1920)
16:9 (1920×1080)
1:1 (1080×1080)
The video will be generated in the selected resolution. If the uploaded or crawled images are of lower quality than the selected resolution, the AI will automatically enhance the image quality using upscaling technology.
You can select multiple aspect ratios. If multiple options are selected, the generated videos for each ratio will be available on the list screen.
2) Set Video Length : You can choose from the following three video length options
AI Recommendation
5 seconds
15 seconds
If you select AI Recommendation, the AI will analyze the images and automatically determine the optimal video length. If there are not enough suitable images to match the selected video length, some scenes may repeat, or the video quality may be affected.
.png)
3. Click the Create button, and the AI will analyze the entered URL and crawl images from the product page. The AI selects images that are most suitable for video creation, so some images may not be included in the process.
While the video is being created, you can click the Collapse button at the top-right corner to close the window and continue with other tasks. The progress can be tracked from the URL/Image to Video list screen.
If you click the Cancel Creation button, the current process will be terminated, and you will be redirected to the list screen.
.png)
.png)
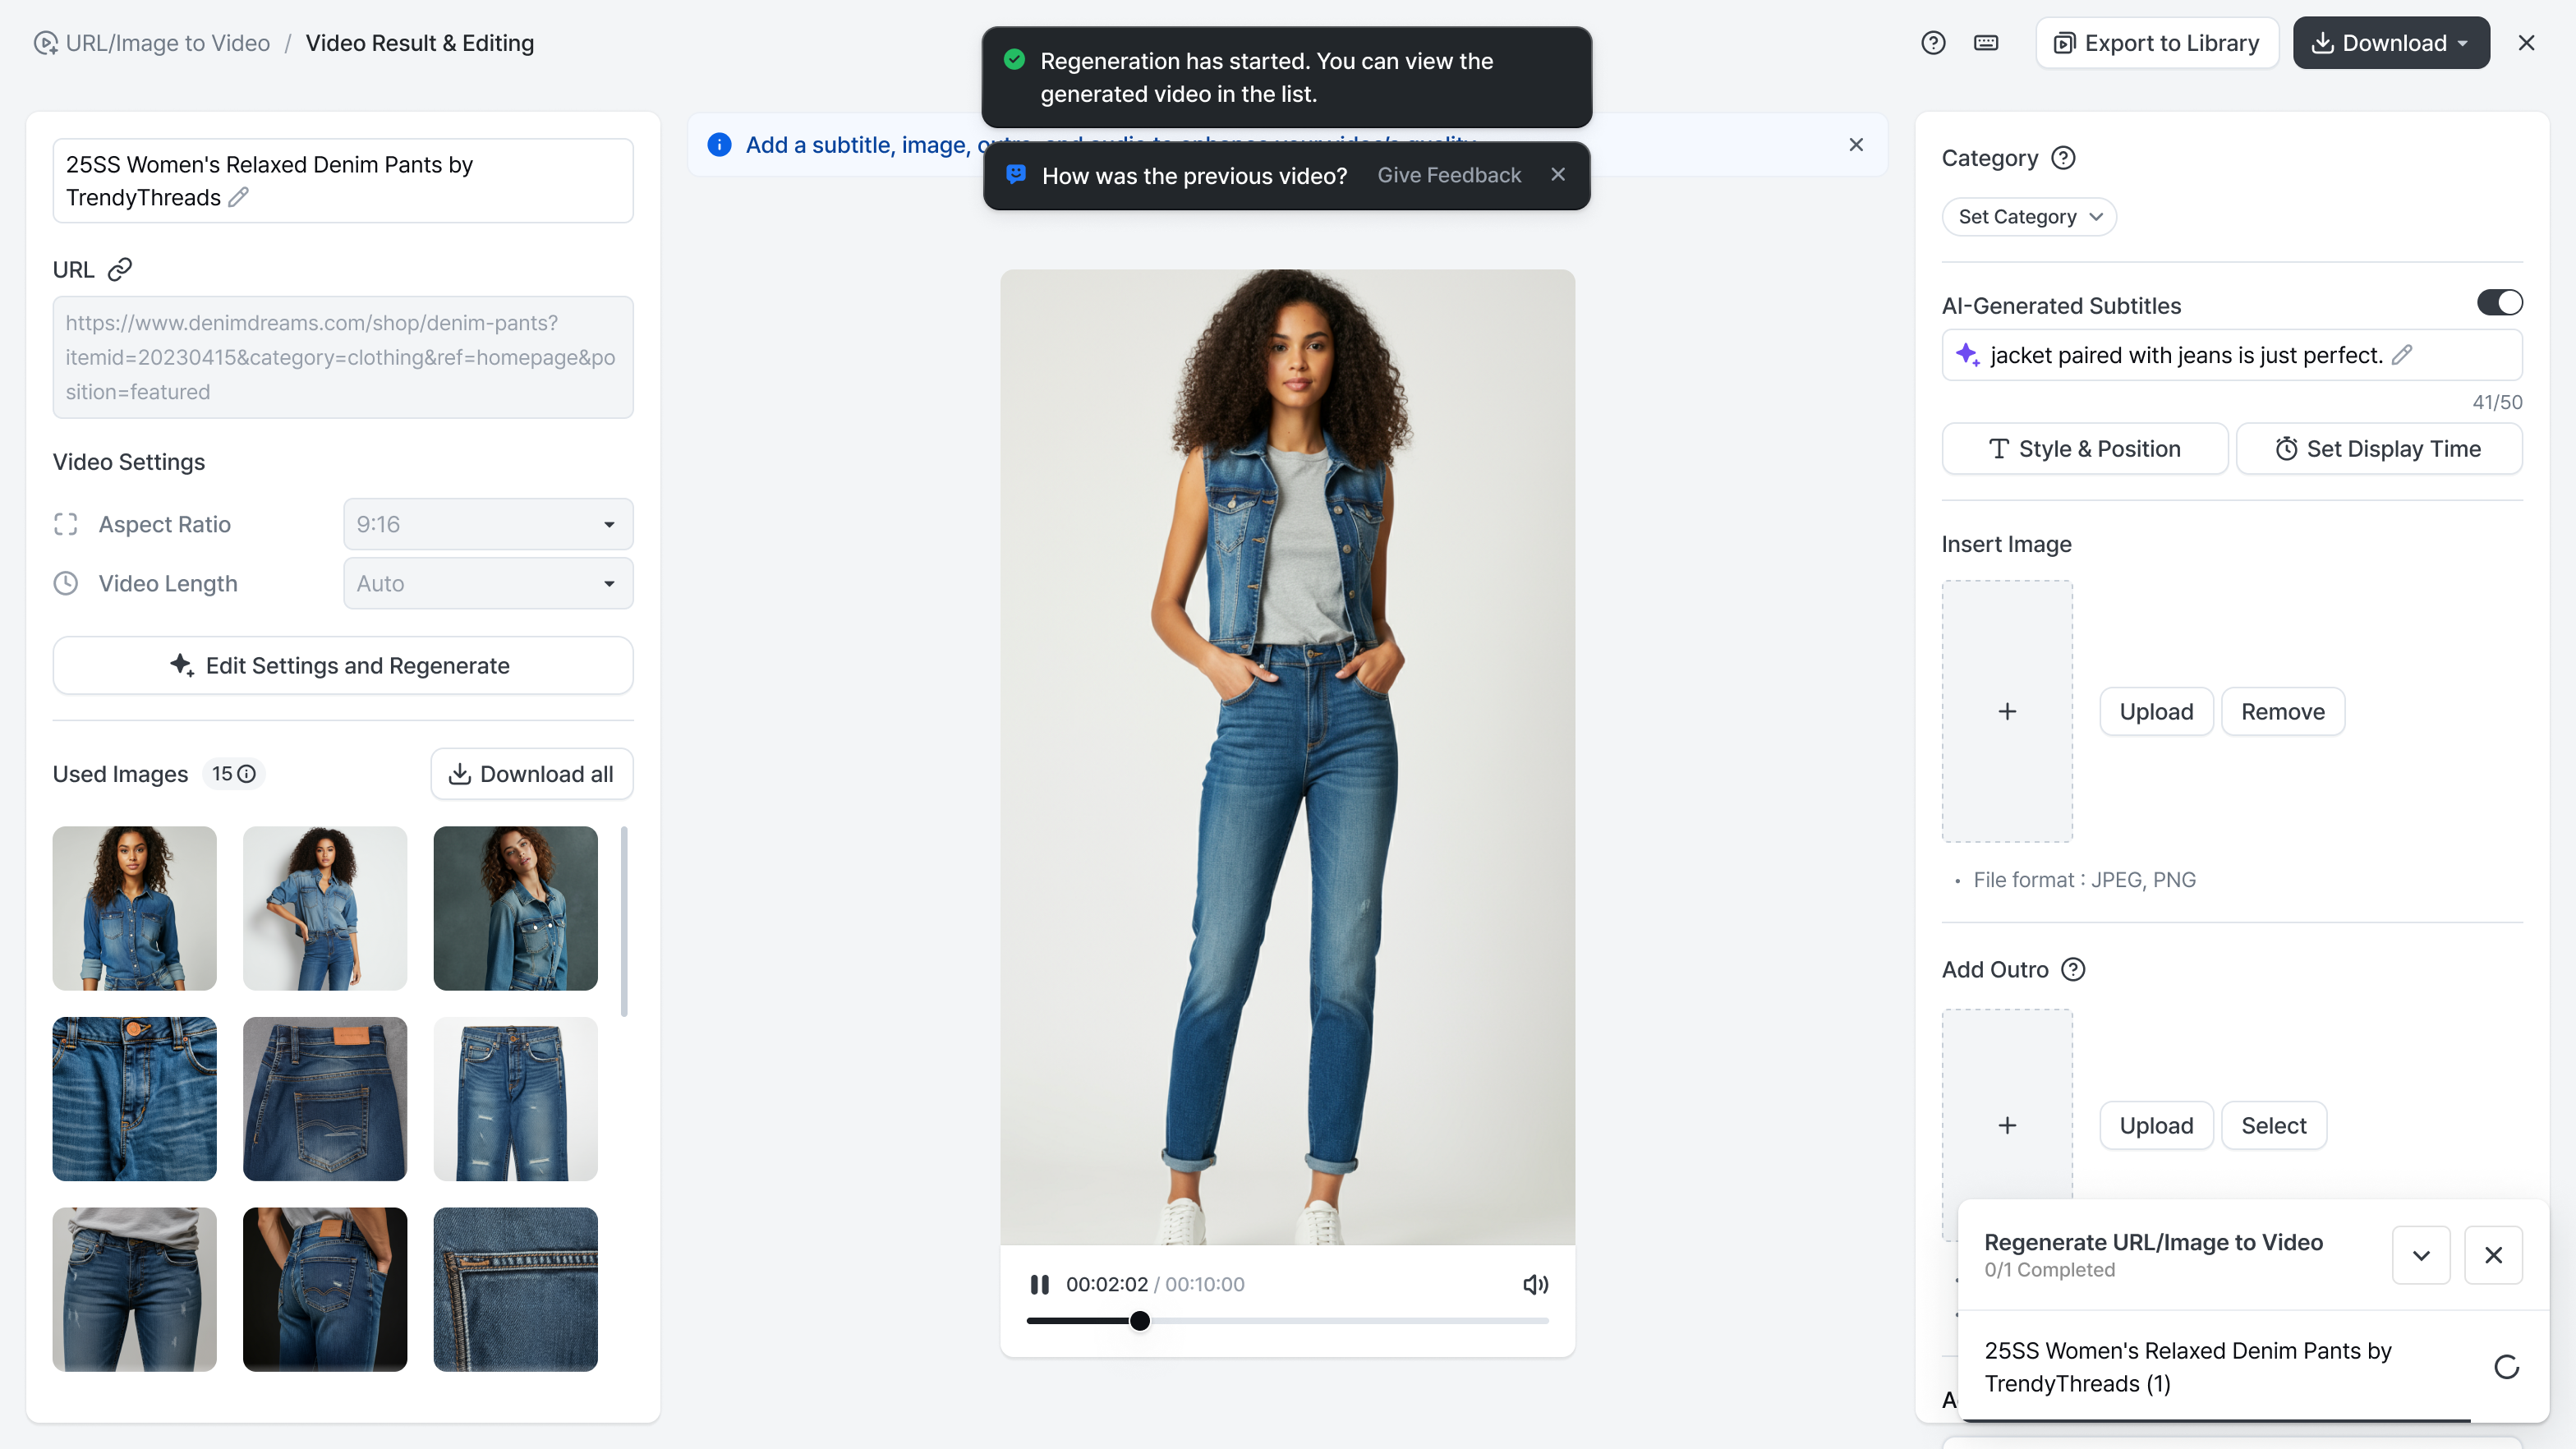
2. Review and Edit the Created URL to Video
You can preview the generated URL to Video content and customize it using various editing options to achieve your desired style. All edits are saved automatically.
1) Title : The system automatically retrieves product information from the entered URL and displays it as the video title. If product information cannot be detected, the video creation timestamp will be shown as the title.
2) URL Area : You can view the full URL that was entered. Click the Link icon to open the URL in a new tab.
3) Video Settings : Check the aspect ratio and video length selected during the creation process. If multiple aspect ratios were chosen, only one will be displayed as the representative format in the video result and editing screen. To review or edit videos in other aspect ratios, click the corresponding video from the list.
4) Used Images : Displays the number of images included in the video. The AI automatically selects the most suitable images for the video’s flow, so some crawled images may be excluded.
5) Category Settings : Assign categories to your video for easier management and organization.
6) AI-Generated Subtitles : The AI analyzes the video and generates a one-line description automatically. You can use the generated text as-is or edit it as needed. Customize the subtitle design through the Subtitle Style Settings and adjust the display timing to ensure the text appears at the most effective moment.
7) Insert Image : Add images to your video by clicking the Upload button to upload an image directly or selecting an image from the library. Enhance your video by adding logos, intro images, or other visual elements.
8) Add Outro : Add an outro image at the end of your video. The outro image will automatically adjust to fit the video size and will be displayed for 3 seconds at the end of the video. Click the Upload button to add an image directly or select an outro image from the library. A well-crafted outro can leave a lasting impression and create a clean ending for your video.
9) Add Audio : Add audio to your video for a more dynamic and engaging experience. Use audio files uploaded to the library, including music, sound effects, or voiceovers, to enhance the video’s mood and improve viewer immersion.
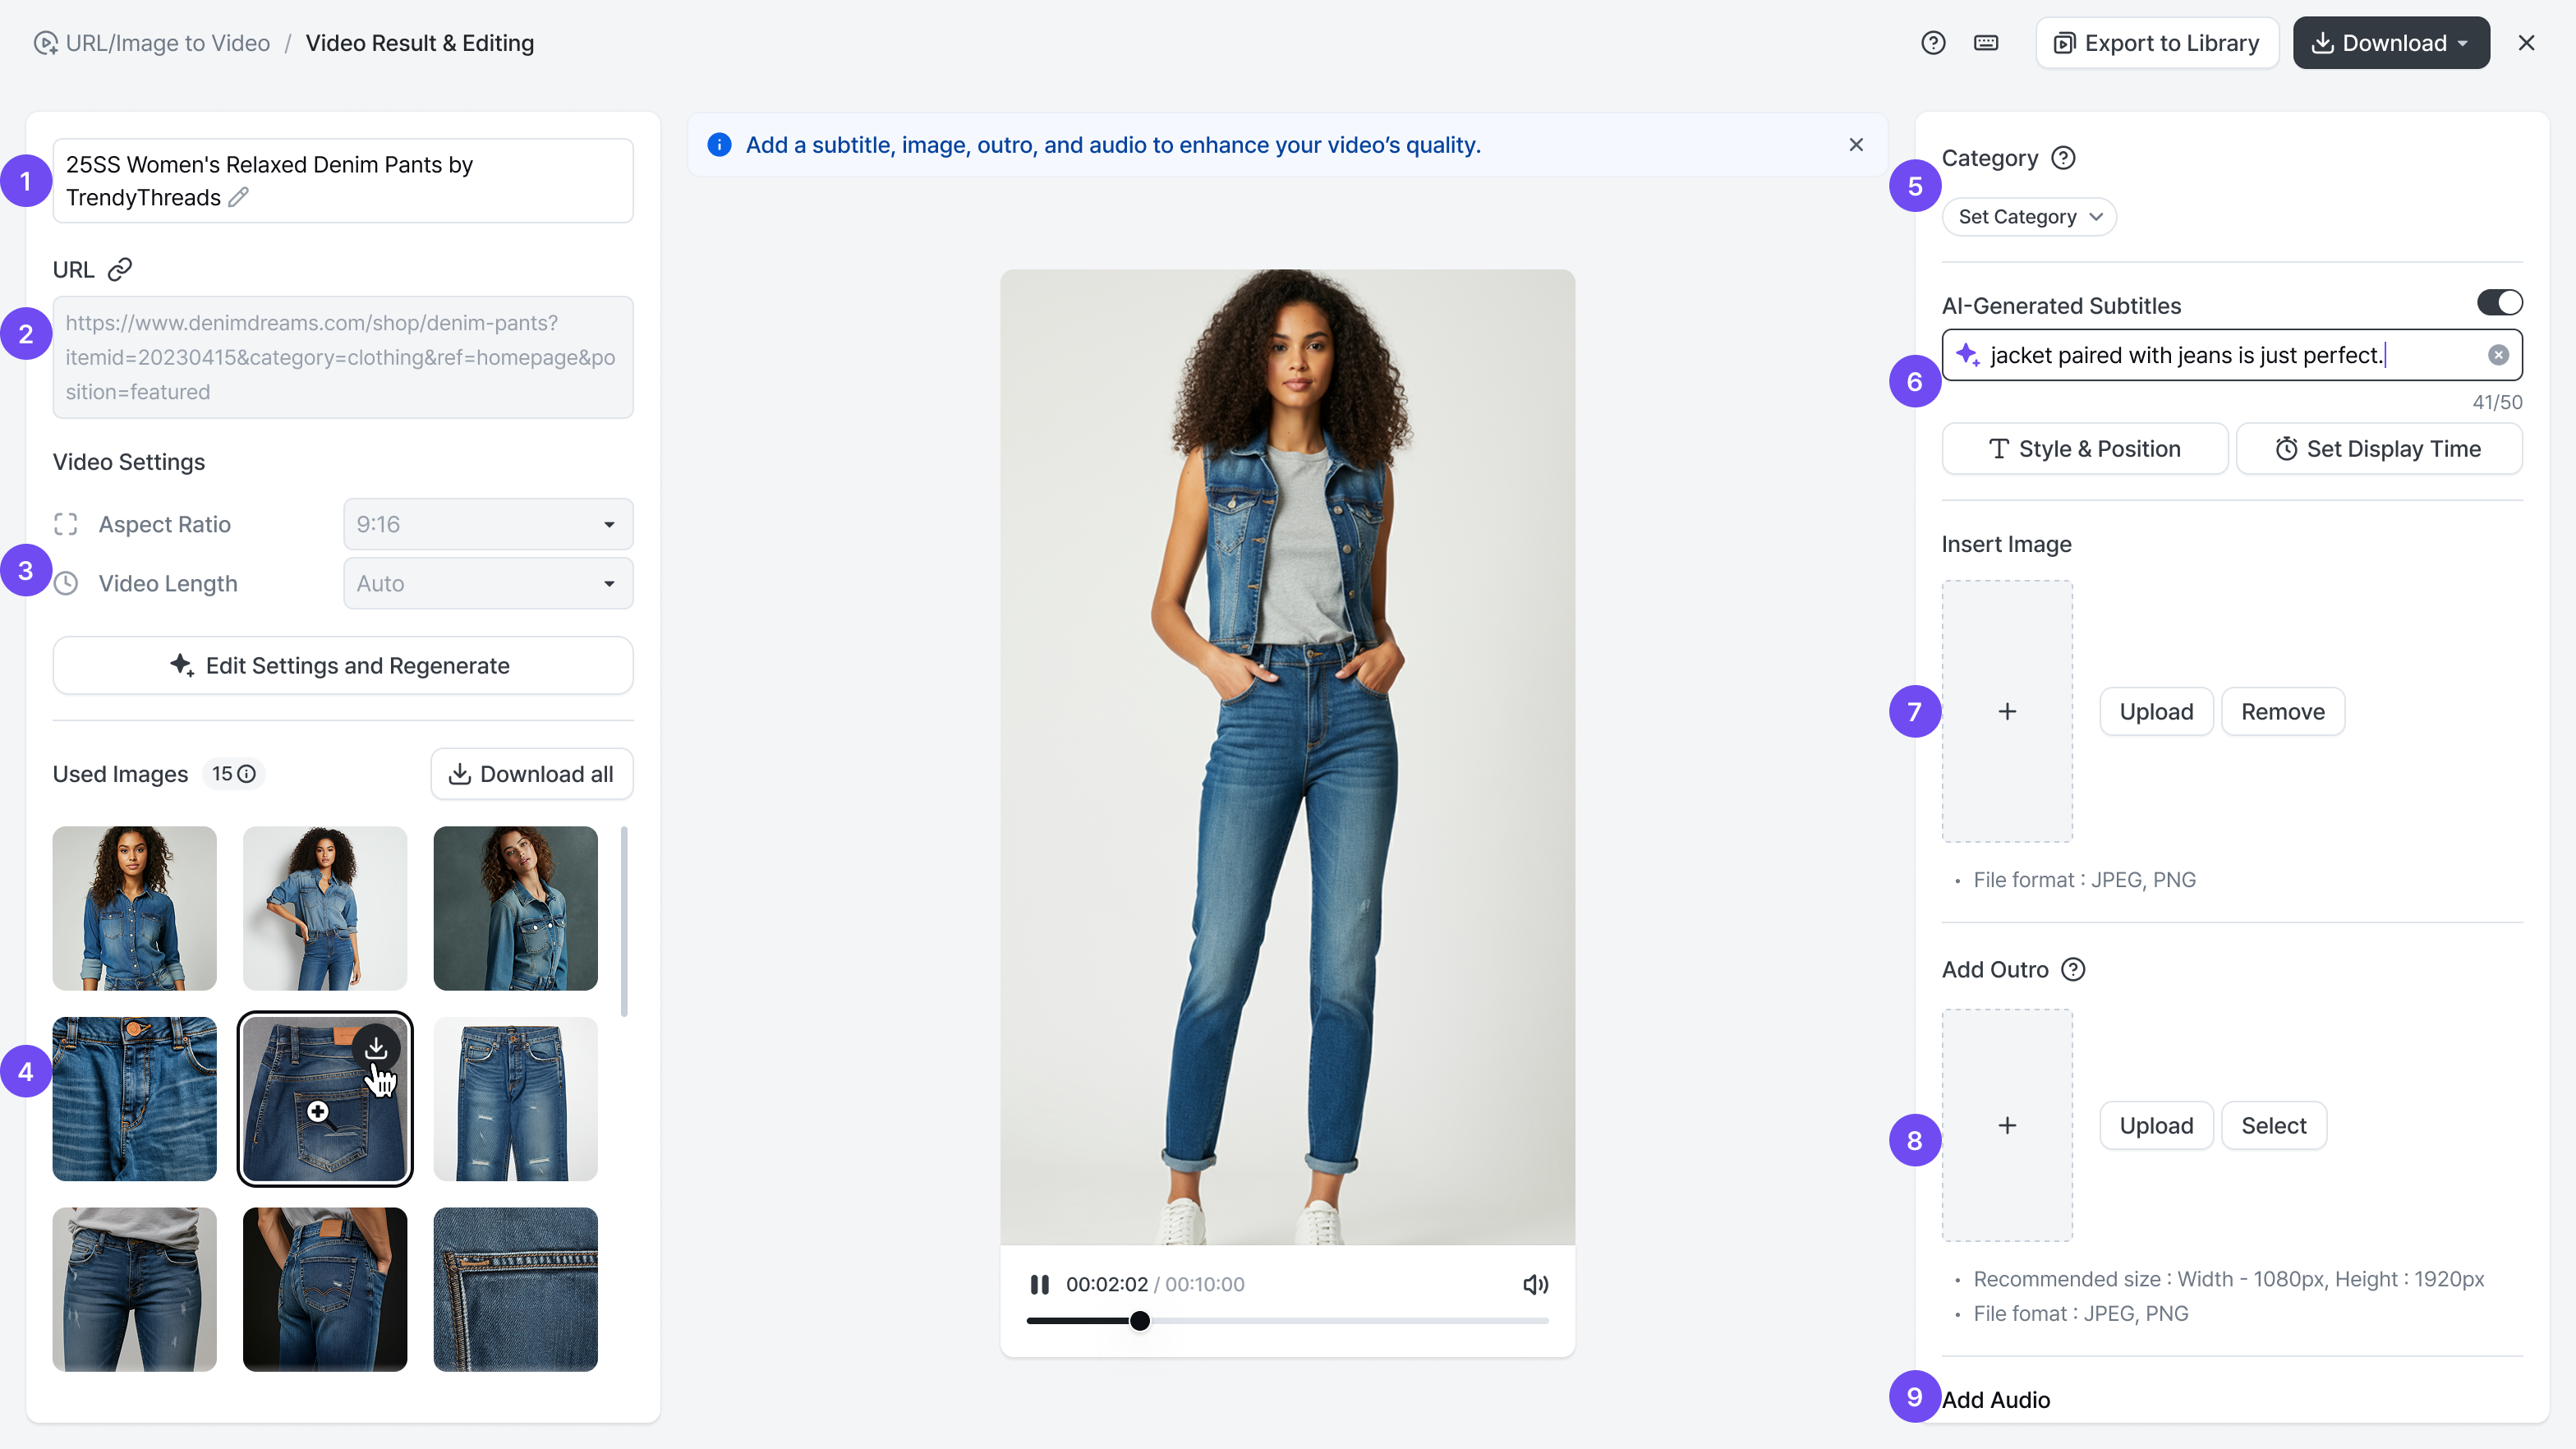
3. Edit Settings and Regenerate
After modifying the settings, click the Regenerate button to recreate the video with updated parameters such as video aspect ratio, video length, or selected images. This feature allows you to apply changes efficiently without starting the entire process from scratch, enabling quick adjustments and faster video creation.
.png)
1) All Images List
The list displays all images extracted from the entered URL.
In addition to the crawled images, you can also upload additional images that you’d like to include in the video.
To delete an image from the list, click the X button.
Select the images you want to use for video creation. You can choose a minimum of 2 and a maximum of 20 images.
Since the AI automatically selects the most suitable images for the video’s flow, some uploaded or crawled images may be excluded from the final video.
To deselect all selected images at once, click the X (Deselect All) button next to the selection count.
2) Regenerate
A new video will be generated based on the updated settings.
The original video will remain unchanged, and the newly generated video can be found on the list screen.
You can also monitor the progress in the Progress Popup at the bottom-right corner.
Click the Open button in the progress popup to directly access the detailed page for the corresponding video in a new tab.