Shopify
- 印刷する
Shopify
- 印刷する
記事の要約
この要約は役に立ちましたか?
ご意見ありがとうございます
ログイン
Shopifyにログイン
テーマの編集
オンラインストアからテーマを選択します。現在のテーマで、「アクション」をクリックし、「コードを編集」をクリックします。
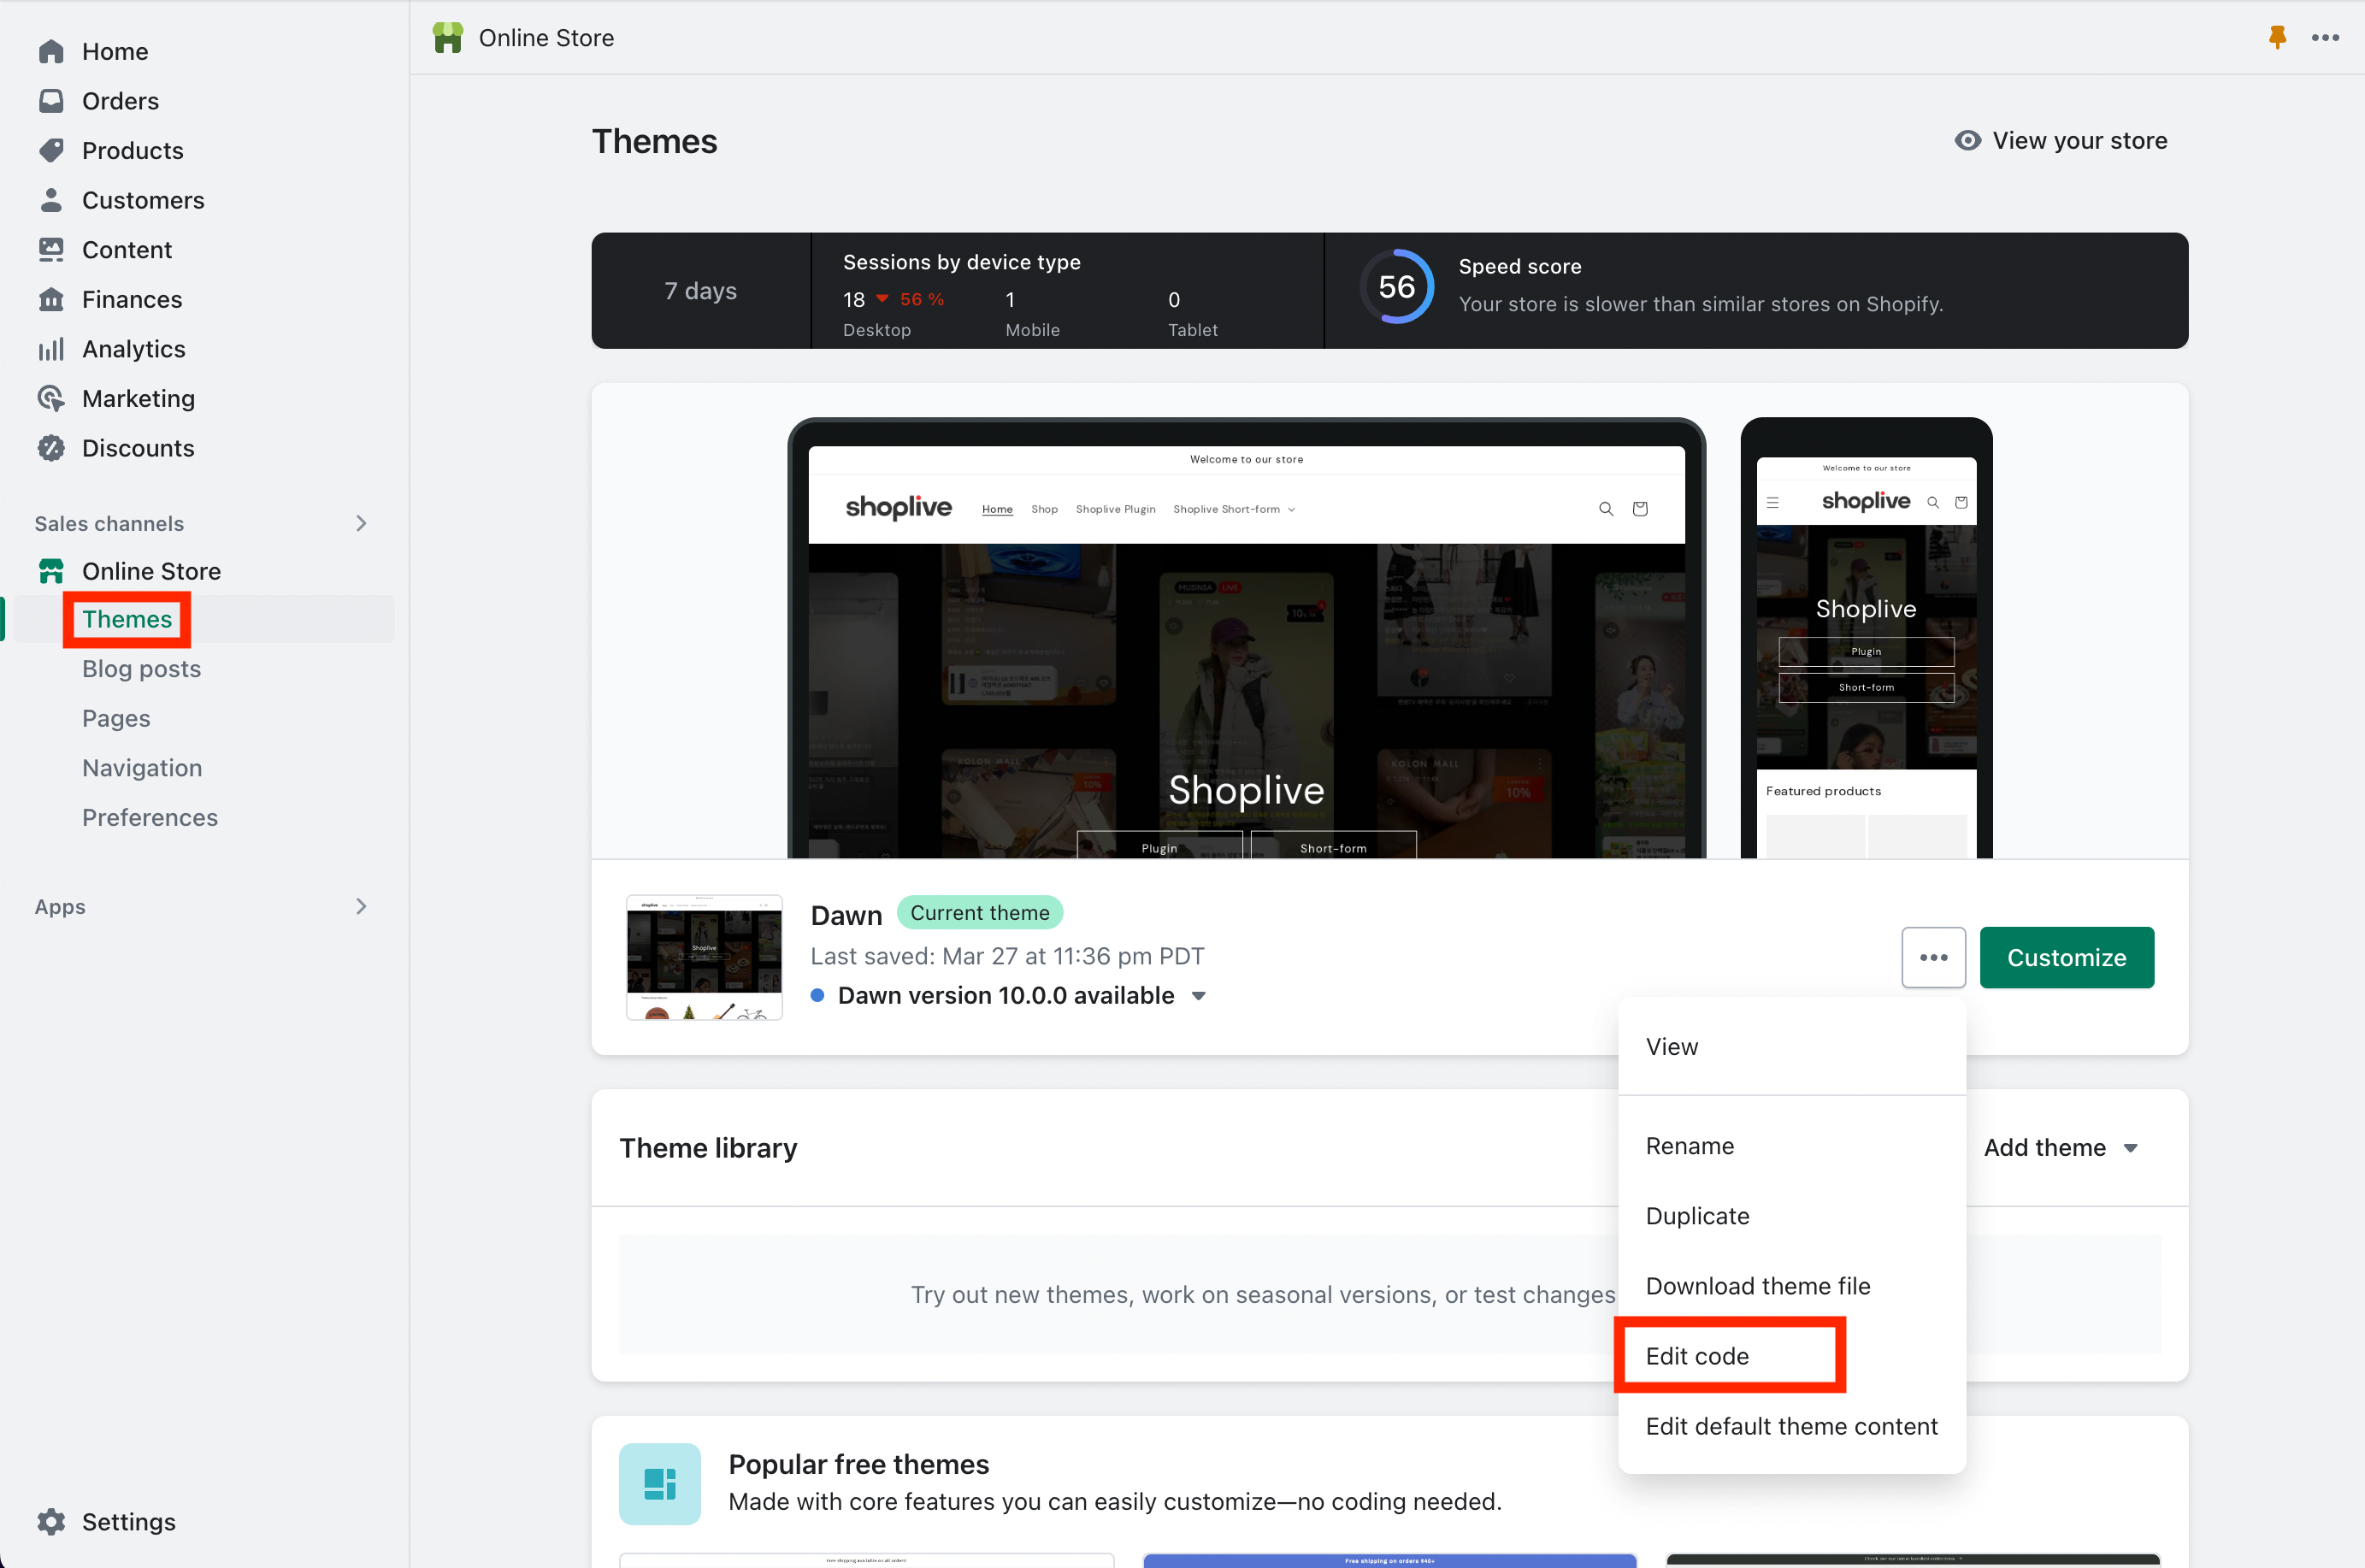
コードの編集
コード編集ウィンドウが開いたら、 theme.liquid をクリックし、タグの下に以下のコードを入力します。アクセスキーを「ACCESS_KEY」に入力し、保存します。
.png "스크린샷 2024-06-03 오후 3.00.56(3).png")
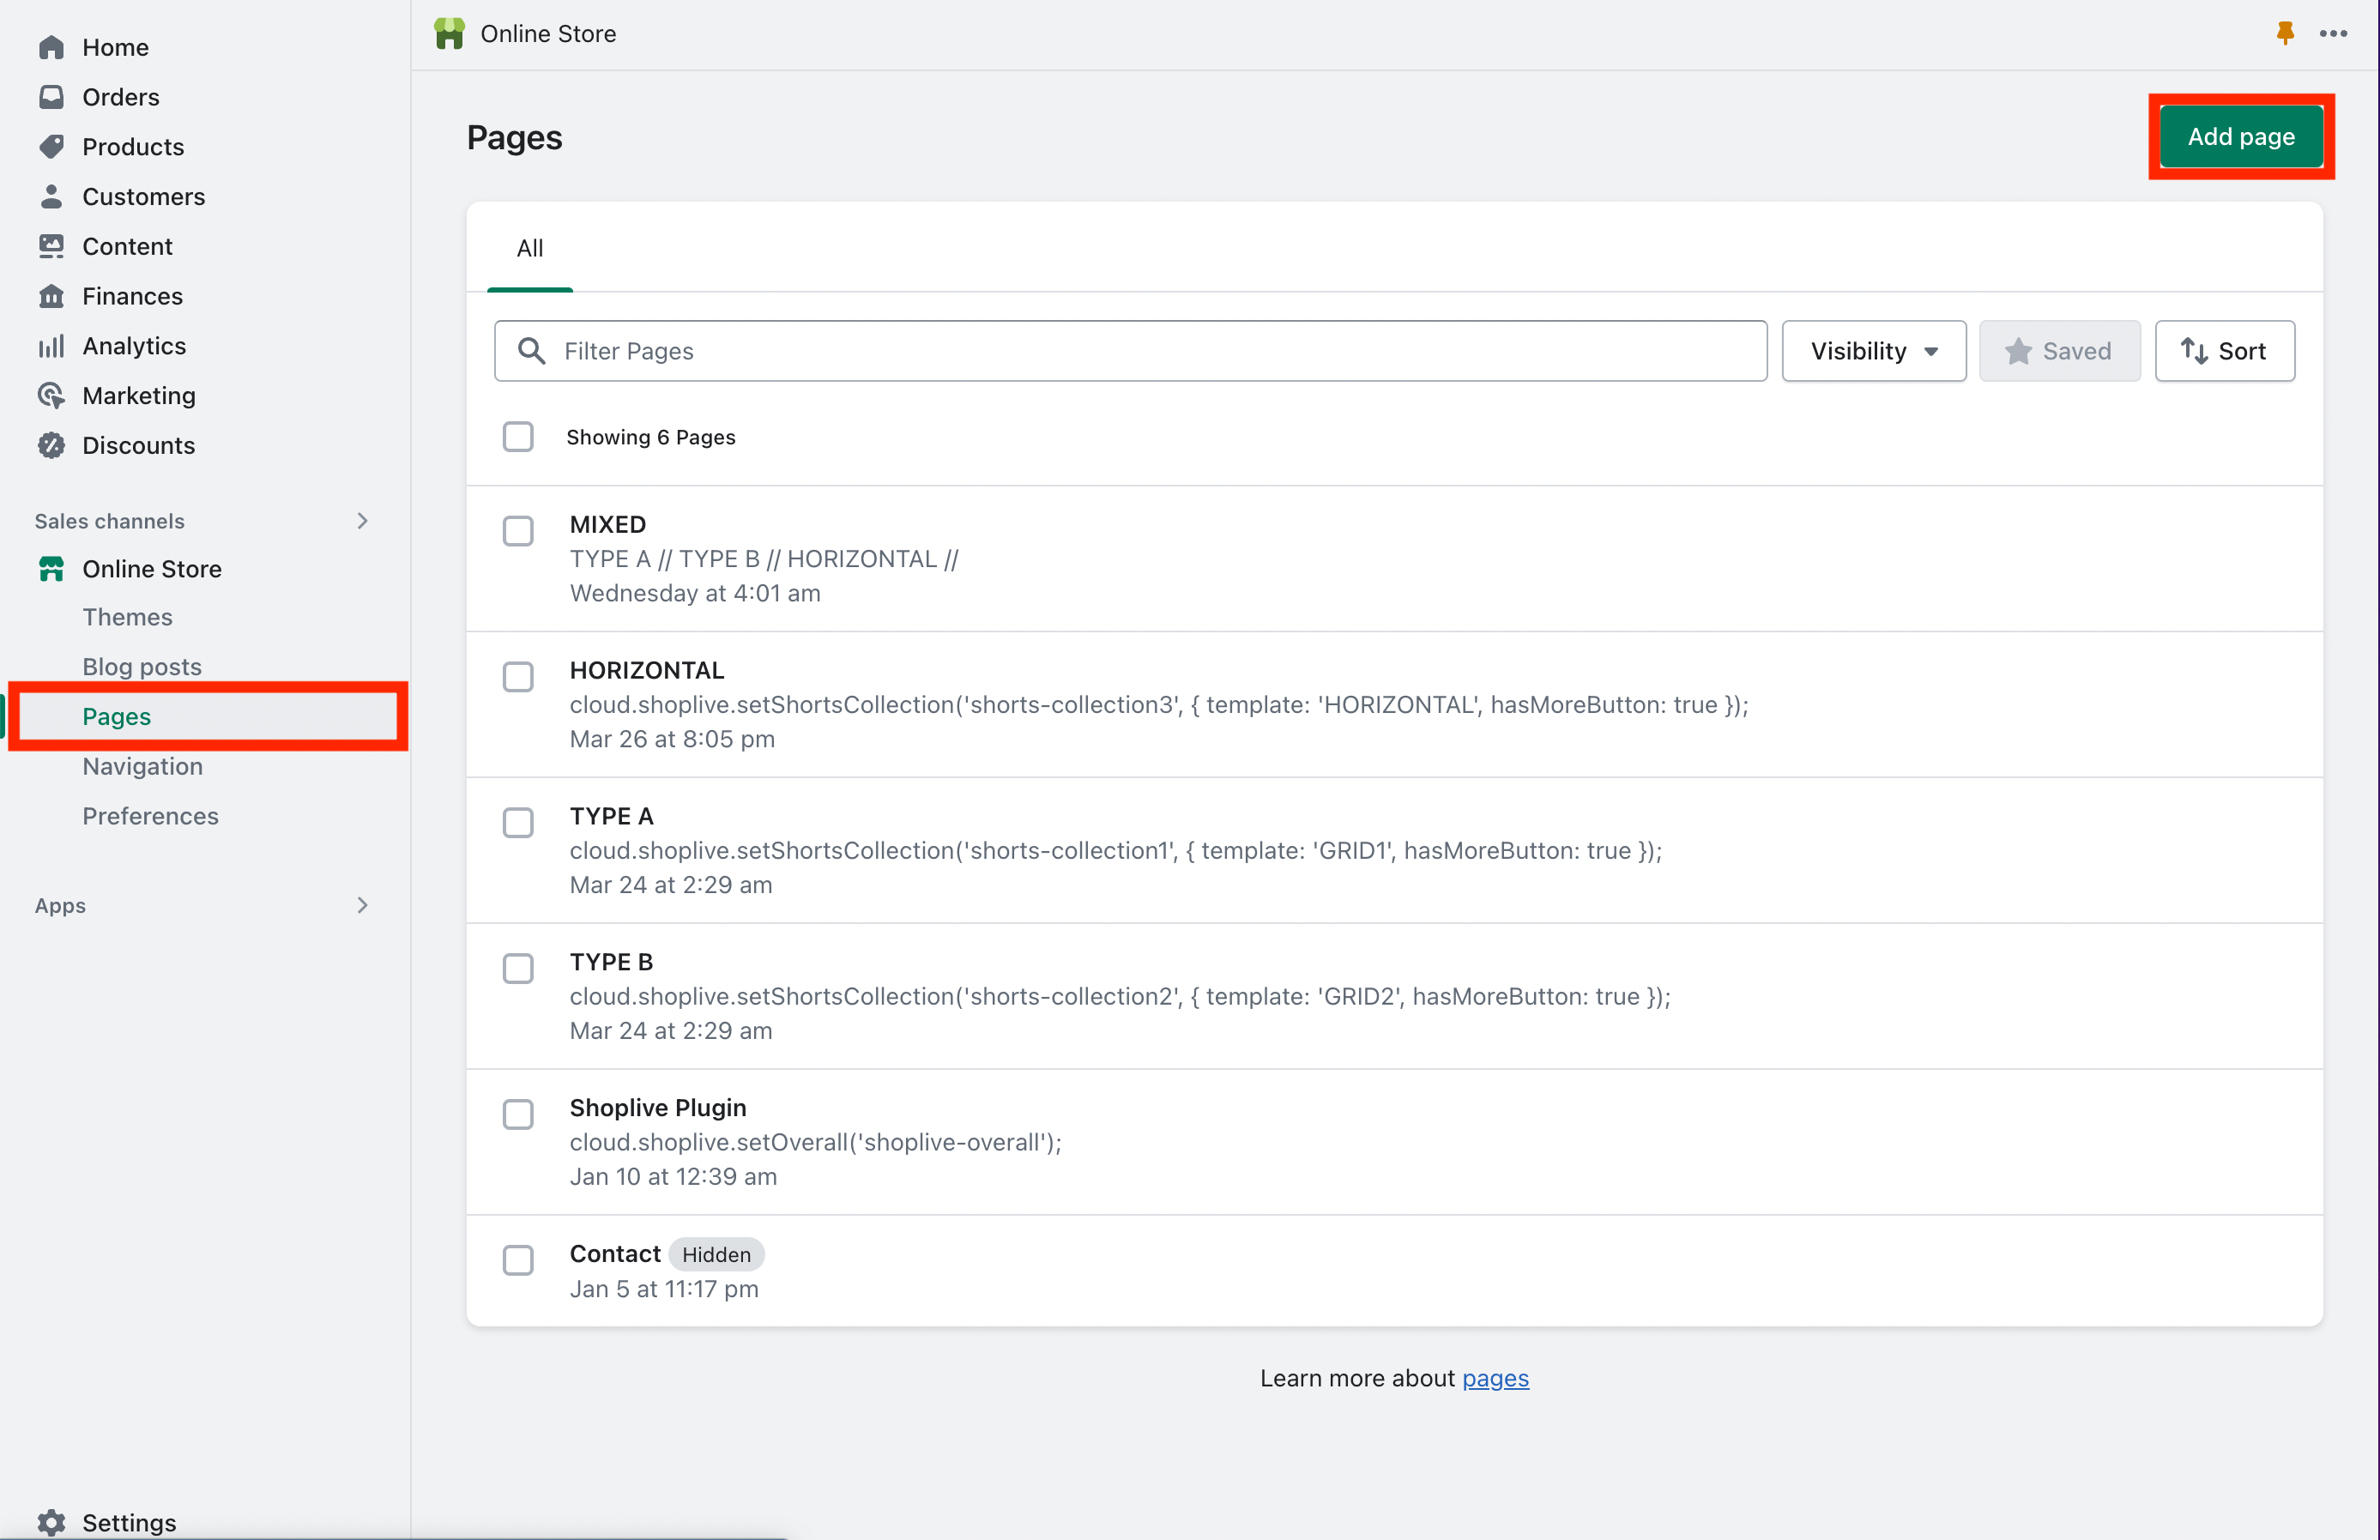
ページの編集
「ページ」ボタンをクリックして、ライブ ページ を追加します。[ ページを追加 ]ボタンをクリックし、タイトルを入力し、以下のコードを入力して保存します。
.png "image(748).png")
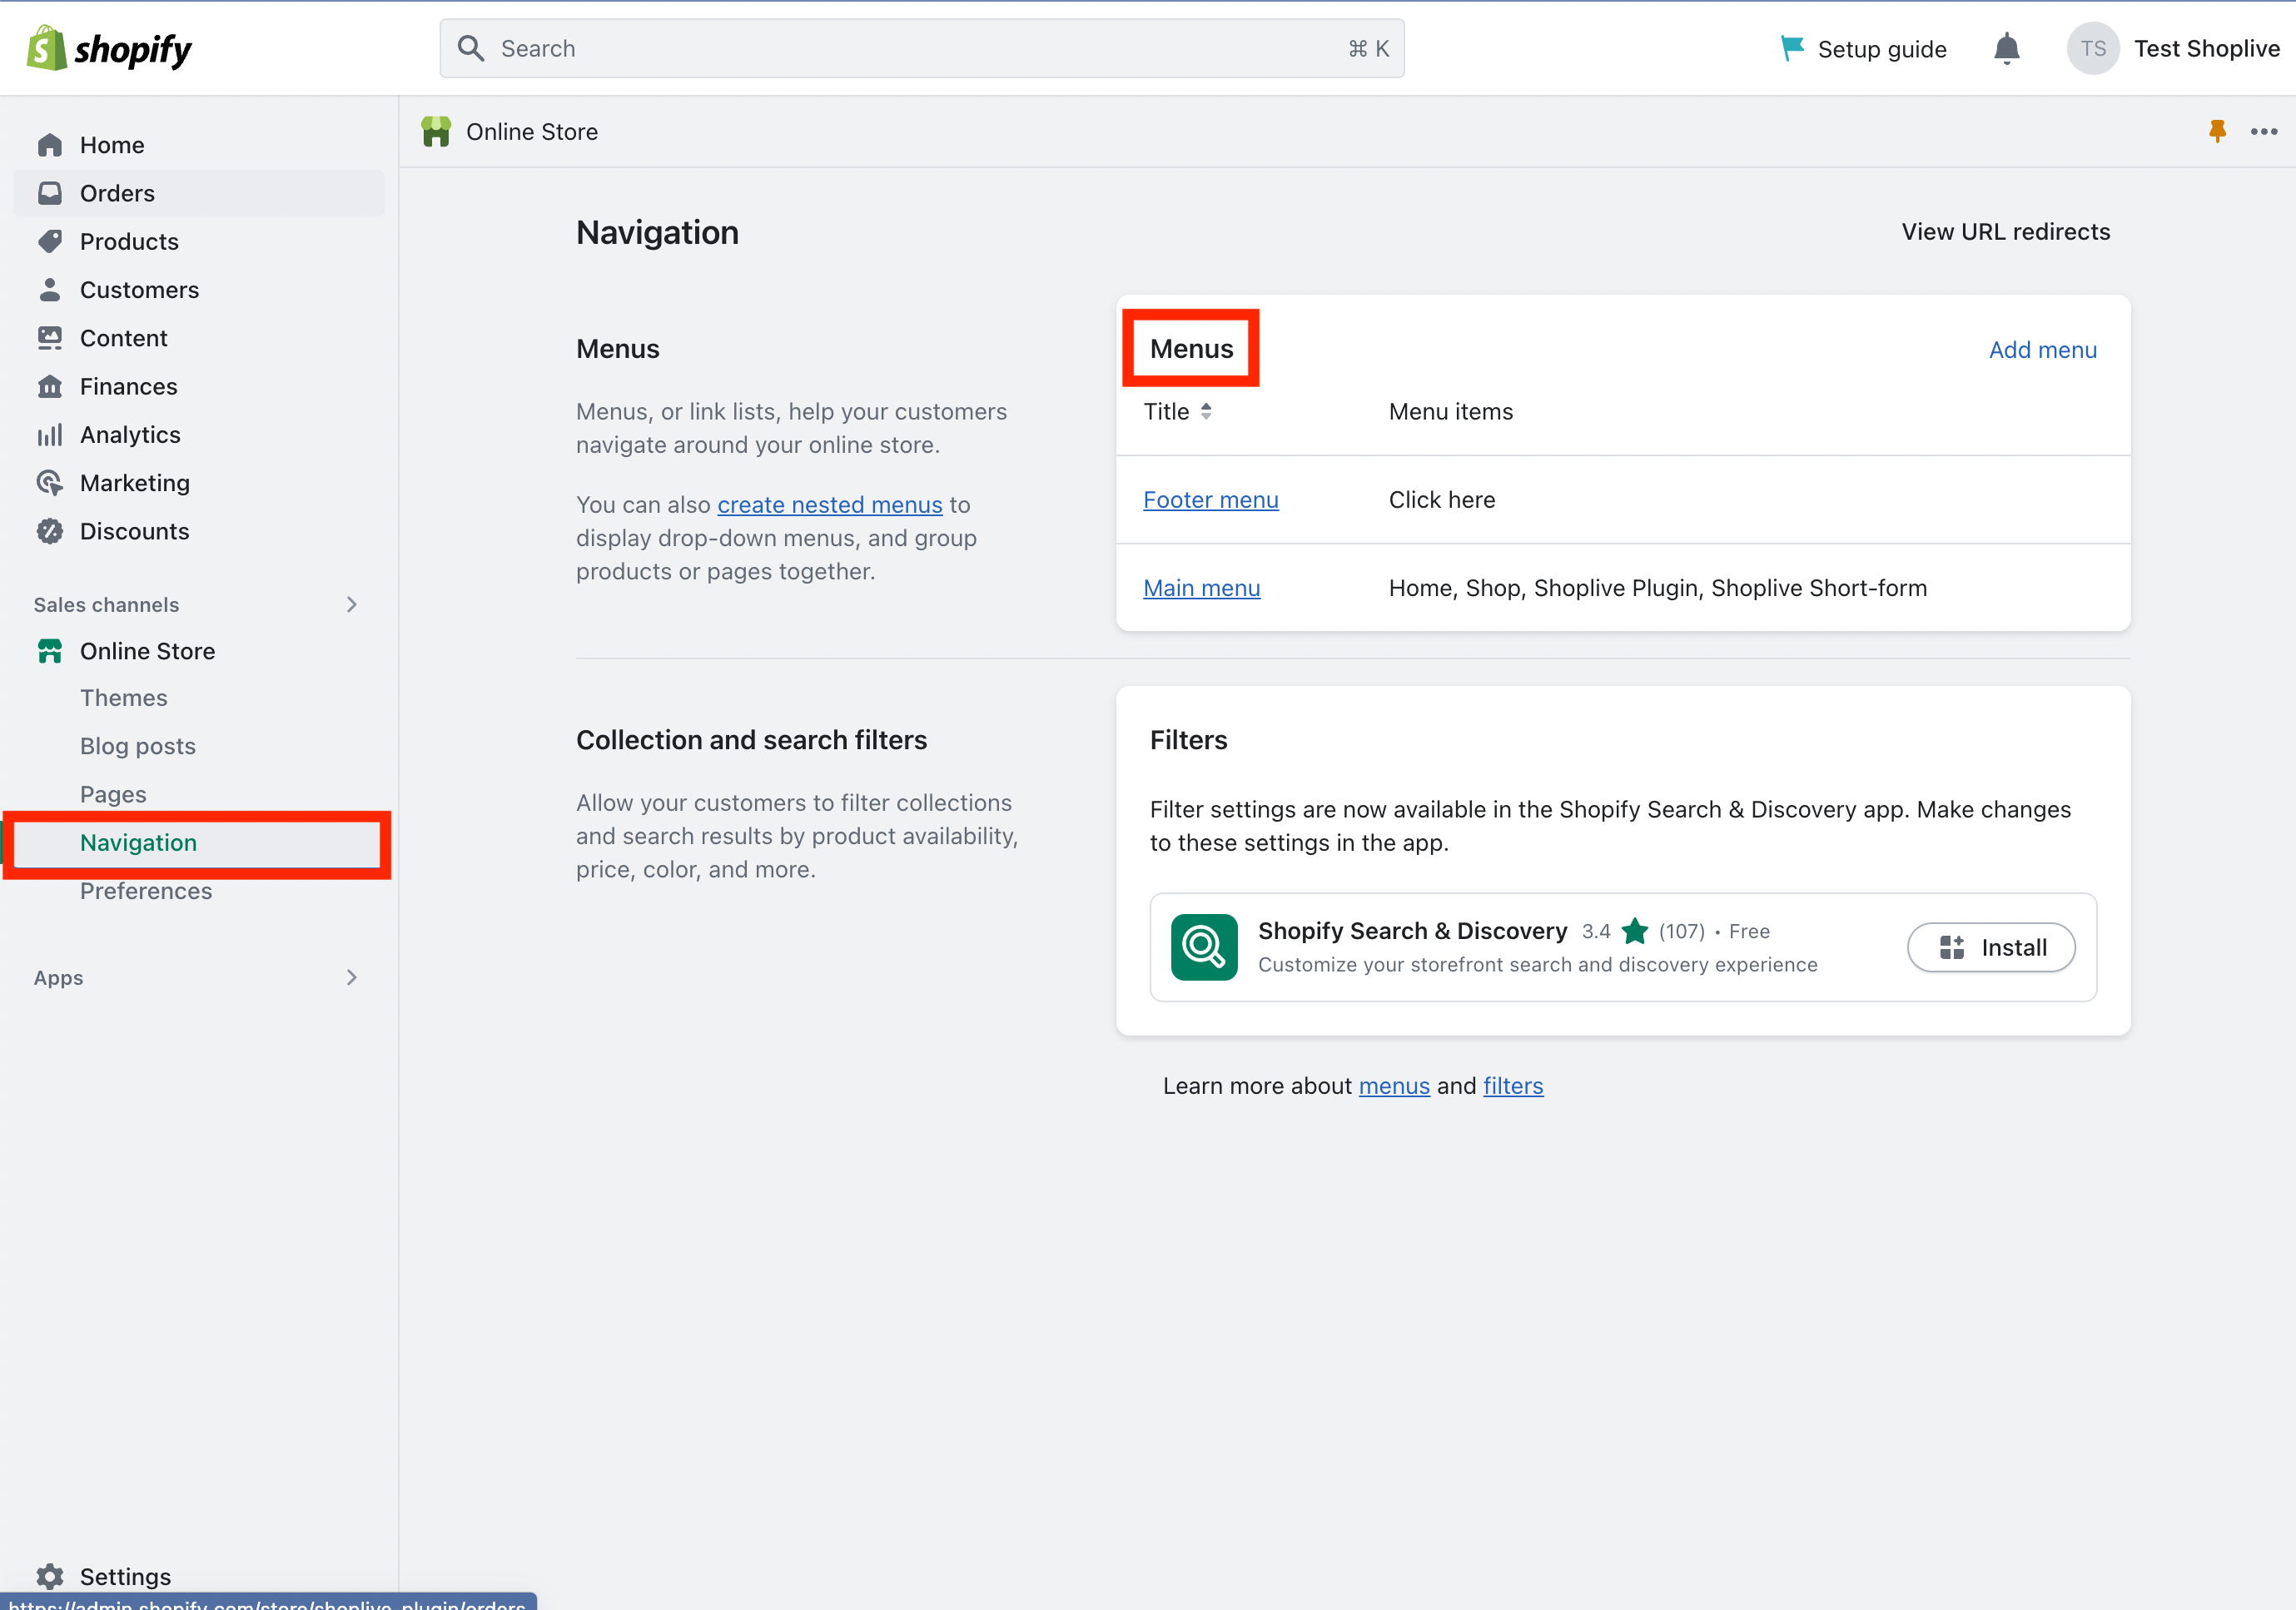
編集メニュー
「 探索 」をクリックしてメニューを選択し、ライブ・ページを表示し、カテゴリを編集します。
セットアップの完了
すべての設定が完了したら、Webサイトのプレビューでミニプレビューが表示されるかどうかを確認します。ミニプレビューが公開されていない場合は、「キャンペーンの詳細」に移動し、進行中のライブキャンペーンのプラグイン/APIを「公開」に設定します。
Conversion Pixel
Shopifyに購入シグナルスクリプトをインストールするには
1. 画面下部の「設定」ボタンをクリックします。

2. 「お客様のイベント」 > 「カスタムピクセルを追加」ボタンをクリックします。

3. タイトルを入力し、次に以下のコードを入力して保存します。
var script = document.createElement('script');
script.type = 'text/javascript';
script.src = 'https://static.shoplive.cloud/shoplive.js';
script.async = true;
document.head.appendChild(script);

script.onload = function () {
   if (typeof cloud !== 'undefined' && cloud.shoplive) {
       var customerId = null;

       cloud.shoplive.init({
           accessKey: '<YOUR_ACCESS_KEY>'
       });

       analytics.subscribe('checkout_completed', (event) => {
           try {
               console.log("Event received:", event);
               const checkout = event.data.checkout;
               console.log("Checkout data:", checkout);
               const orderId = checkout.order.id;
               console.log("Order ID:", orderId);

               if (customerId == null) {
                    customerId = checkout.order.customer.id
                    console.log("Customer ID:", customerId);
                    if (customerId !== null) {
                        cloud.shoplive.setUserObject({
                            userId: customerId
                        });
                    }
                    else console.log('customer id is null')
                }

               const purchasedItems = checkout.lineItems.map((item) => {
                   console.log("Processing item:", item);
                   return {
                       sku: item.variant.sku,
                       purchaseUnitPrice: parseFloat(item.variant.price.amount),
                       purchaseQuantity: item.quantity
                   };
               }
               );
               console.log("Purchased items:", purchasedItems)
               const conversionConfig = {
                   accessKey: '<YOUR_ACCESS_KEY>',
                   eventType: 'purchase',
                   products: purchasedItems,
                   orderId: orderId
               };
               cloud.shoplive.sendConversionEvent(conversionConfig);
           } catch (error) {
               console.error('send conversion failure:', error);
           }
       }
       );
   } else {
       console.error('cloud.shoplive does not exist');
   }
}
script.onerror = function () {
   console.error('script load failure');
}
4. 「連携」ボタンをクリックします。
.png "스크린샷 2024-06-03 오후 4.47.15(2).png")